Software to Map Multiple Locations (Top Platforms)
The Ultimate Guide to Software for Mapping Multiple Locations: Build vs. Buy
If you need to visualize dozens or hundreds of locations on a custom map, you’re searching for specialized software. The right tool can turn a complex spreadsheet into an interactive, user-friendly map. This guide will show you how to build a basic version yourself and then reveal a much more efficient alternative.
Method 1: Building Your Own with Mapbox GL JS (The Flexible but Technical Route)
Mapbox is a powerful platform known for its beautiful custom map designs. While more developer-friendly in some aspects, creating multi-location mapping software with it still requires significant coding.
Step 1: Set Up Your Mapbox Project
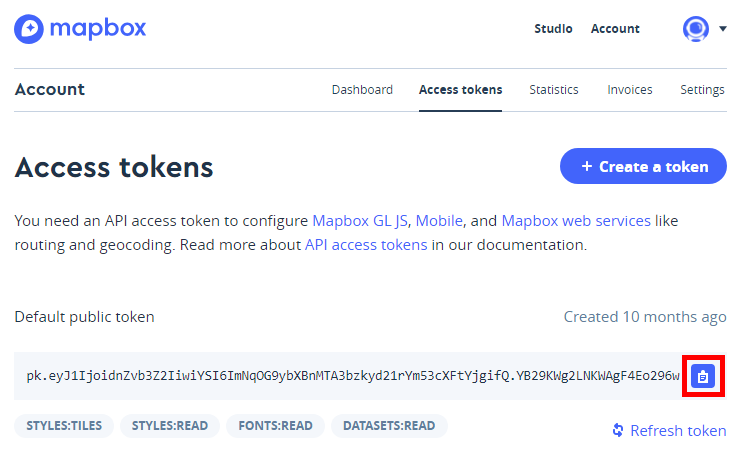
1. Sign up for a [Mapbox account](https://www.mapbox.com/) and navigate to your account dashboard.
2. Get your public access token. You’ll use this to load maps and tools.
3. Understand the pricing: While generous free tiers exist, high traffic or advanced features can incur costs.
Where to find your Mapbox access token.
Step 2: Create the Basic Map HTML Structure
Create an `index.html` file and include the Mapbox GL JS library.
html
<!DOCTYPE html>
<html>
<head>
    <meta charset="utf-8">
    <title>Multi-Location Map with Mapbox</title>
    <meta name="viewport" content="width=device-width, initial-scale=1">
    <!-- Load Mapbox GL JS -->
    <script src="https://api.mapbox.com/mapbox-gl-js/v3.8.0/mapbox-gl.js"></script>
    <link href="https://api.mapbox.com/mapbox-gl-js/v3.8.0/mapbox-gl.css" rel="stylesheet" />
    <style>
        body { margin: 0; padding: 0; }
        #map { position: absolute; top: 0; bottom: 0; width: 100%; }
        /* Style for clustered markers */
        .mapboxgl-marker { cursor: pointer; }
    </style>
</head>
<body>
    <div id="map"></div>
    <script>
        // YOUR CODE WILL GO HERE
    </script>
</body>
</html>
Code language: HTML, XML (xml)
Step 3: Initialize the Map and Add Data
Inside the `<script>` tags, add the following JavaScript. Replace `’YOUR_MAPBOX_TOKEN‘` with your actual token.
javascript
// Set your Mapbox access token
mapboxgl.accessToken = 'YOUR_MAPBOX_TOKEN';

// Initialize the map
const map = new mapboxgl.Map({
    container: 'map',
    style: 'mapbox://styles/mapbox/light-v11', // Choose a map style
    center: [-74.5, 40], // Starting position [lng, lat]
    zoom: 9
});

// Sample location data - in reality, this would come from a database or API
const locations = [
    { name: "Location A", coordinates: [-74.5, 40.1] },
    { name: "Location B", coordinates: [-74.6, 40.2] },
    { name: "Location C", coordinates: [-74.4, 39.9] },
    // ... imagine 100+ more entries
];

// Wait for the map to load before adding markers
map.on('load', () => {
    // Add a source for your data
    map.addSource('locations', {
        type: 'geojson',
        data: {
            type: 'FeatureCollection',
            features: locations.map(loc => ({
                type: 'Feature',
                geometry: {
                    type: 'Point',
                    coordinates: loc.coordinates
                },
                properties: {
                    title: loc.name
                }
            }))
        },
        cluster: true, // Enable clustering
        clusterMaxZoom: 14,
        clusterRadius: 50
    });

    // Add a layer for the clusters
    map.addLayer({
        id: 'clusters',
        type: 'circle',
        source: 'locations',
        filter: ['has', 'point_count'],
        paint: {
            'circle-color': '#007cbf',
            'circle-radius': 20
        }
    });

    // Add a layer for individual locations
    map.addLayer({
        id: 'unclustered-point',
        type: 'circle',
        source: 'locations',
        filter: ['!', ['has', 'point_count']],
        paint: {
            'circle-color': '#11b4da',
            'circle-radius': 8,
            'circle-stroke-width': 1,
            'circle-stroke-color': '#fff'
        }
    });
});
Code language: JavaScript (javascript)
Step 4: Adding Interactivity (Popups on Click)
To make the map useful, you need to add popups that show location info when clicked.
javascript
// Add click event for clusters
map.on('click', 'clusters', (e) => {
    const features = map.queryRenderedFeatures(e.point, {
        layers: ['clusters']
    });
    const clusterId = features[0].properties.cluster_id;

    map.getSource('locations').getClusterExpansionZoom(
        clusterId,
        (err, zoom) => {
            if (err) return;

            map.easeTo({
                center: features[0].geometry.coordinates,
                zoom: zoom
            });
        }
    );
});

// Add click event for individual points
map.on('click', 'unclustered-point', (e) => {
    const coordinates = e.features[0].geometry.coordinates.slice();
    const title = e.features[0].properties.title;

    // Ensure the popup appears in the correct place
    while (Math.abs(e.lngLat.lng - coordinates[0]) > 180) {
        coordinates[0] += e.lngLat.lng > coordinates[0] ? 360 : -360;
    }

    new mapboxgl.Popup()
        .setLngLat(coordinates)
        .setHTML(`<strong>${title}</strong>`)
        .addTo(map);
});Code language: JavaScript (javascript)
The Hidden Complexity of DIY Mapping Software
While the code above creates a functional map, consider what’s missing for a **production-ready** solution:
- 1. Data Management Backend: You need a database and admin interface to add/edit locations without touching code.
- 2. Geocoding: Converting human addresses (“123 Main St”) to coordinates requires another API (like Mapbox Geocoding) and more code.
- 3. Advanced Filtering: Letting users filter by location type or region requires building UI controls and complex data filtering logic.
- 4. Performance Optimization: Handling thousands of points requires server-side clustering and pagination.
- 5. Mobile Responsiveness: Ensuring the map works perfectly on all devices.
- 6. Maintenance: Updating libraries, fixing bugs, and managing API costs.
Building all this represents months of development work.
Method 2: Complete Mapping Software That Works Out of the Box
Why reinvent the wheel when specialized software exists to solve exactly this problem?
MapsFun.com is dedicated software for mapping multiple locations, designed to give you professional results in minutes instead of months.
Here’s what real mapping software should provide:
1. Drag-and-Drop Data Import: Upload an Excel or CSV file with addresses. The software automatically geocodes them and plots them on a map. No coding, no APIs to manage.
2. Live Data Management: Edit locations directly in a clean dashboard. Add custom fields, categories, and photos. Changes appear instantly on your live map.
3. Built-In Professional Features:
- Smart Clustering: Automatically groups nearby markers at higher zoom levels.
- Advanced Filtering: Add category filters, search boxes, and radius search with clicks, not code.
- Custom Styling: Match your brand with custom colors, map styles, and marker icons.
- Multiple Views: Switch between map, satellite, and terrain views.
4. One-Click Deployment: Get an embed code for your website, a shareable link, or even integrate via API if needed. It’s fully responsive and works on all devices.
Stop building software and start using it. If you need to map multiple locations for your business—whether it’s store locators, service areas, event venues, or portfolio sites— MapsFun.com provides a complete, no-code solution that eliminates the complexity of DIY development. Create your first professional multi-location map in under 5 minutes.