How to Mark Multiple Locations on Google Maps (2025 Step-by-Step Guide)
How to Mark Multiple Locations on Google Maps: The Ultimate Guide
Need to plot several points on a Google Map for your business locations, a road trip, or event planning? While Google offers basic tools, creating a truly customized, embeddable map can be surprisingly complex. This guide will walk you through the most common methods and their challenges.
Method 1: Using Google Maps “Saved Lists” (For Personal Use)
This is the quickest way to save a few locations for your own reference, but it’s not suitable for embedding on a website.
- 1. Go to Google Maps: Open https://www.google.com/maps and ensure you’re signed in.
- 2. Search for a Location: Find the first place you want to mark.
- 3. Save the Location: Click on the location name or marker, and in the sidebar that appears, click the “Save” icon.
- 4. Choose a List: Select an existing list (e.g., “Favorites,” “Want to go”) or create a new one.
- 5. Repeat: Continue searching and saving each location to the same list.
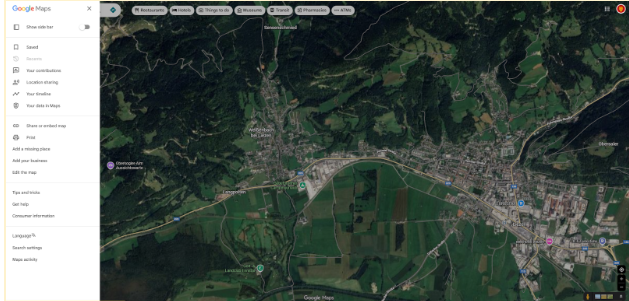
To view your marked locations:
- – Click the menu button (☰) in the top-left corner.
- – Select “Your places” and then go to the “Saved” tab.
- – Click on the list you created to see all your marked locations on the map.
The Problem: This map is personal. There is no direct way to embed this on your website or share it in a professional, branded way. It’s designed for personal use, not for business integration.
Method 2: Using Google My Maps (The “Official” Embedding Method)
Google My Maps is a separate tool for creating custom maps that can be embedded. It’s more powerful but has a dated interface.
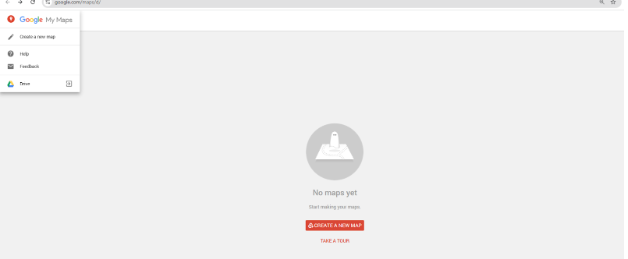
Step 1: Create Your Map
- 1. Navigate to https://www.google.com/mymaps
- 2. Click “Create a New Map”.
- 3. Give your map a title and description by clicking on “Untitled map.”
Step 2: Add Your Markers (Locations)
You have two options:
- – Search: Use the search bar to find an address and click “Add to map.”
- – Manual Marker: Click the marker icon below the search bar, then click on the exact spot on the map.
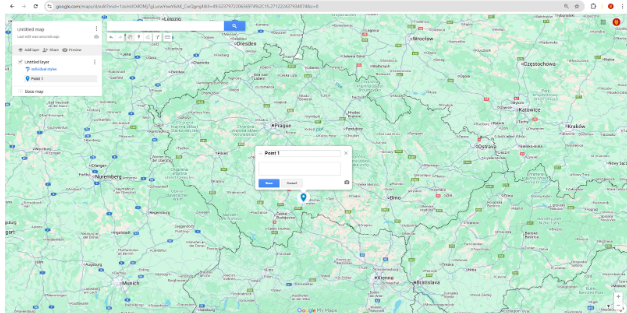
Step 3: Customize and Embed
- 1. Click on a marker to open its info window. Here you can edit the name, add a description, and even change the icon color and shape.
- 2. When your map is ready, click the “Share” button. Set the privacy to “Public on the web” so it can be embedded.
- 3. To embed, click the three-dot menu (⋮) next to the map title and select “Embed on my site”.
- 4. Copy the provided `<iframe>` code and paste it into your website’s HTML.
html
<iframe src="https://www.google.com/maps/d/embed?mid=1YOUR_MAP_ID_HERE&ehbc=2E312F" width="640" height="480"></iframe>Code language: HTML, XML (xml)The Limitations:
- – The design is generic and often doesn’t match modern website aesthetics.
- – Advanced features like custom marker images or complex info windows are very limited.
- – The interface can be slow and clunky for managing more than a handful of locations.
Method 3: The Custom Code Approach (For Developers)
For full control, you can use the Google Maps JavaScript API. Here’s a basic code snippet to create a map with multiple markers.
Prerequisite: Get an API Key
- 1. Go to the [Google Cloud Console](https://console.cloud.google.com/).
- 2. Create a project, enable billing, and enable the “Maps JavaScript API.”
- 3. Under “Credentials,” create an API Key and restrict it for security.
The Code
Create an HTML file and use this code. Remember to replace `YOUR_API_KEY`.
html
<!DOCTYPE html>
<html>
<head>
    <title>Custom Multi-Location Map</title>
    <style>
        #map {
            height: 500px;
            width: 100%;
            border: 1px solid #ccc;
            border-radius: 10px;
        }
    </style>
</head>
<body>
    <h2>Our Service Locations</h2>
    <div id="map"></div>

    <script>
        function initMap() {
            // Center the map initially
            const mapCenter = { lat: 48.8566, lng: 2.3522 }; // Paris

            // Create the map
            const map = new google.maps.Map(document.getElementById("map"), {
                zoom: 11,
                center: mapCenter,
            });

            // Define an array of locations [Title, Lat, Lng]
            const locations = [
                ['Louvre Museum', 48.8606, 2.3376],
                ['Eiffel Tower', 48.8584, 2.2945],
                ['Notre-Dame Cathedral', 48.8530, 2.3499]
            ];

            const infowindow = new google.maps.InfoWindow();

            // Loop through locations and create markers
            locations.forEach(([title, lat, lng]) => {
                const marker = new google.maps.Marker({
                    position: { lat: lat, lng: lng },
                    map: map,
                    title: title
                });

                // Add a click event to show the location name
                marker.addListener("click", () => {
                    infowindow.setContent(`<strong>${title}</strong>`);
                    infowindow.open(map, marker);
                });
            });
        }
    </script>
    <!-- Load the API with your key -->
    <script async defer src="https://maps.googleapis.com/maps/api/js?key=YOUR_API_KEY&callback=initMap"></script>
</body>
</html>
Code language: HTML, XML (xml)
The Significant Challenges:
- – Technical Expertise Required: You need knowledge of HTML, CSS, and JavaScript.
- – API Management: You must handle a Google Cloud account, billing, and API key security.
- – Complexity Scales Fast: Simple customizations (like a custom marker icon) require additional code, and advanced features (like marker clustering for 100+ locations) become very complex.
The Simple, Professional Solution: MapsFun.com
As you can see, marking multiple locations seems simple at first, but creating a professional, customizable, and embeddable map without technical headaches is nearly impossible with the standard tools.
This is exactly why MapsFun.com was created. It bridges the gap between the limited “My Maps” and the complex API.
- – No-Code Visual Editor: Point, click, and search to add locations. No programming needed.
- – Rich Customization: Easily upload custom marker icons, style your map with themes, and add images or text to your info windows.
- – Instant Embedding: Get a clean, responsive embed code in seconds, with a design that actually complements your website.
- – No API Keys or Billing: We handle all the technical backend, so you can focus on creating your map.
Why struggle with clunky interfaces or complex code? You can create a stunning, custom map with multiple markers in minutes. Try the easy way at MapsFun.com.