How to Embed Google Maps in Webflow
How to Add Google Maps to Webflow (The Complete, Yet Cumbersome, Guide)
Embedding an interactive Google Map into your Webflow site seems straightforward until you need a map with custom pins, multiple locations, or advanced styling. The native embed method has severe limitations. This guide walks you through the technically correct but complex process of adding a powerful custom map.
Part 1: The Basic (But Limited) Embed Method
For a single, static location, Webflow offers a quick fix.
- 1. Go to Google Maps, find your location.
- 2. Click “Share” > “Embed a map”.
- 3. Copy the provided `<iframe>` code.
- 4. In your Webflow Designer, add an Embed element (`</>`) from the Add panel.
- 5. Paste the iframe code into the element settings.
Pasting a standard Google Maps iframe into a Webflow Embed element.
The Limitations Are Severe:
- You cannot add multiple custom markers.
- Styling options are non-existent (stuck with the default Google look).
- The iframe is often not fully responsive on all devices.
- It looks generic and unprofessional.
Part 2: The Advanced Custom Map Method (Using the Google Maps API)
This is the real way to get a fully customizable, multi-location map. Be warned: it involves code and multiple steps.
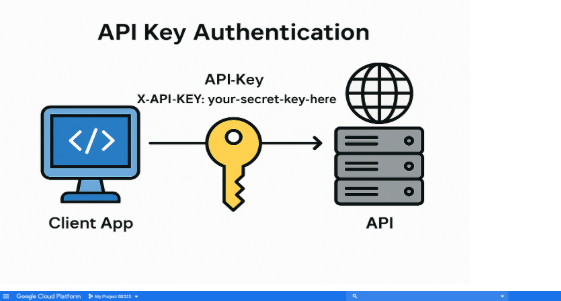
Step 1: Get a Google Maps API Key (The Gatekeeper)
- 1. Go to the [Google Cloud Console](https://console.cloud.google.com/)
- 2. Create a project, enable billing (the $200 monthly credit usually covers this), and enable the “Maps JavaScript API”.
- 3. Under “Credentials,” create an API Key.
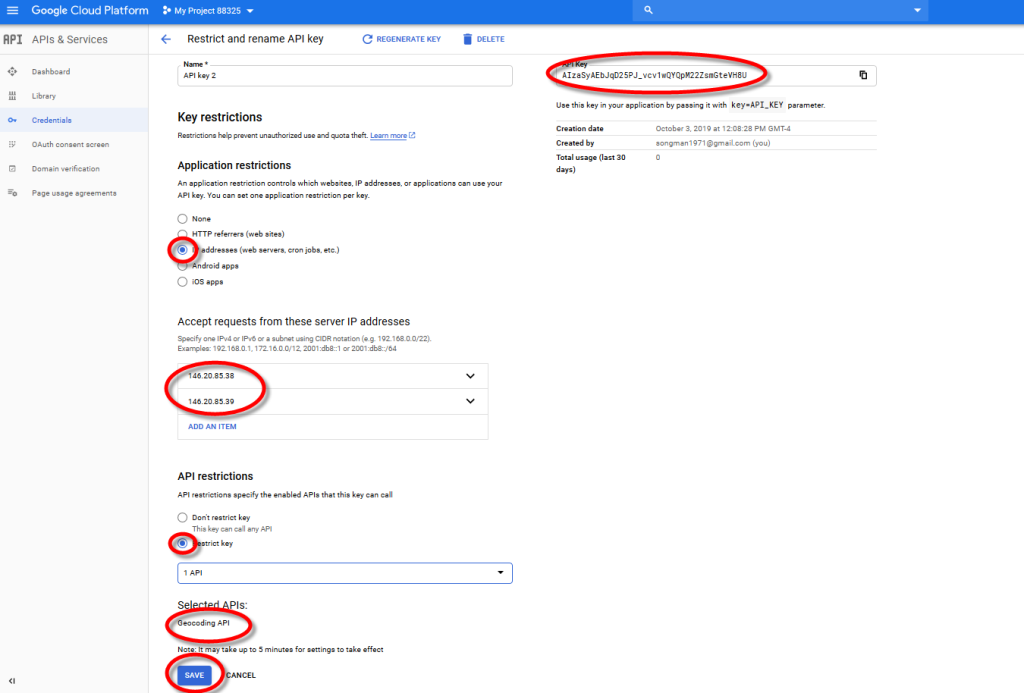
- 4. CRITICAL: Restrict your key. Add your Webflow site’s domain (e.g., `https://your-site.webflow.io` and your custom domain) under “HTTP referrers” to prevent unauthorized use.
Restricting your API Key to your Webflow domains is mandatory for security.
Step 2: Create the Custom Map HTML/JavaScript Code
You’ll need to create the map code in a code editor. Below is a sample for a map with **two custom-marked locations.
html
<!DOCTYPE html>
<html>
<head>
    <!-- Load the Maps API with your key -->
    <script src="https://maps.googleapis.com/maps/api/js?key=YOUR_API_KEY_HERE"></script>
    <style>
        #custom-map {
            width: 100%;
            height: 500px; /* Adjust height as needed */
            border-radius: 12px; /* Example custom styling */
            box-shadow: 0 10px 30px rgba(0,0,0,0.1);
        }
    </style>
</head>
<body>
    <!-- The map container -->
    <div id="custom-map"></div>

    <script>
        function initMap() {
            // Define the map center (often the midpoint of your locations)
            const center = { lat: 40.7128, lng: -74.0060 }; // NYC

            // Initialize the map in the 'custom-map' div
            const map = new google.maps.Map(document.getElementById("custom-map"), {
                zoom: 12,
                center: center,
                styles: [ // Optional: Custom map styling to match your brand
                    { "featureType": "all", "stylers": [{ "saturation": -80 }] }
                ]
            });

            // Define your locations with custom icon (optional)
            const locations = [
                {
                    position: { lat: 40.7128, lng: -74.0060 },
                    title: "Our Main Office",
                    icon: "https://i.imgur.com/your-custom-pin.png" // Optional custom pin
                },
                {
                    position: { lat: 40.7489, lng: -73.9680 },
                    title: "Flagship Store"
                }
            ];

            // Loop through and add markers
            locations.forEach(location => {
                new google.maps.Marker({
                    position: location.position,
                    map: map,
                    title: location.title,
                    icon: location.icon // Uses default if not specified
                });
            });
        }

        // Initialize the map once the page loads
        google.maps.event.addDomListener(window, 'load', initMap);
    </script>
</body>
</html>
Code language: HTML, XML (xml)
Step 3: Integrate the Code into Webflow
This is the tricky part. You can’t just paste the full HTML. You must:
- 1. Split the Code:
- Take the `<style>` CSS and any `<script>` that doesn’t include your API key, and paste it into Project Settings > Custom Code > Footer Code.
- DO NOT PUT YOUR API KEY IN THE FOOTER. It will be exposed.
- 2. Use a Third-Party Script Injector (More Complexity):
- To keep your API key semi-private, you need to host the main JavaScript logic (the `initMap` function with your key) on a separate service like **CodePen** or a secret GitHub Gist.
- You then load that external script in your Footer Code.
- In your Webflow page, you only place the simple `<div id=”custom-map”></div>` container in an Embed element.
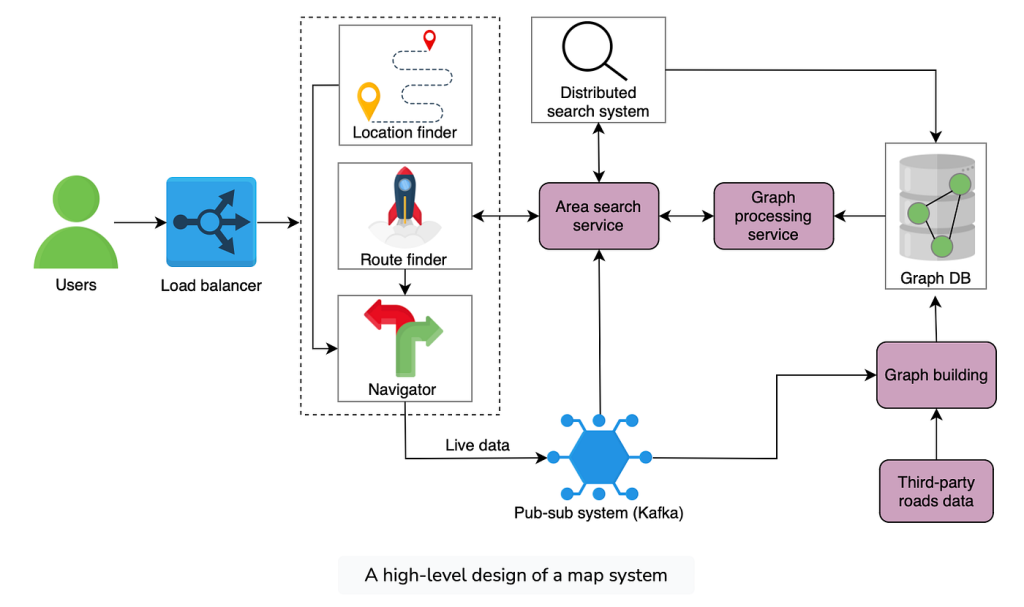
The Result: A beautiful, custom map. The Cost: Hours of setup, ongoing API key management, and a fragile, technical workflow.
The convoluted architecture required for a custom map in Webflow
Why This Process is a Webflow Designer’s Headache
You’re a designer, not a full-stack developer. This process requires:
- Managing Google Cloud billing and quotas.
- Exposing or dangerously hard-coding your API key.
- Creating fragile workarounds to inject code into Webflow.
- Writing and maintaining custom JavaScript for any change (adding a pin, changing a color).
The Professional & Easy Alternative: MapsFun.com
There’s a tool built specifically for Webflow designers who need stunning, interactive maps without the code nightmare.
MapsFun.com integrates seamlessly with Webflow’s no-code philosophy:
- 1. Truly No-Code Editor: Click to add unlimited pins, customize every detail (pins, colors, popups) in a visual editor. No APIs, no keys.
- 2. Native Webflow Integration: Get a clean, secure Embed Code or a Script snippet that you paste directly into a Webflow Embed element or Header/Footer. It just works.
- 3. Built for Designers: Control styles, animations, and layouts to match your brand perfectly. Create multi-location maps, route maps, or interactive guides in minutes.
- 4. Fully Responsive & Fast: Maps are optimized for performance on all devices, unlike bulky iframes.
Stop patching together code and worrying about API limits. Create a map that elevates your Webflow design in minutes. Try MapsFun.com for free.