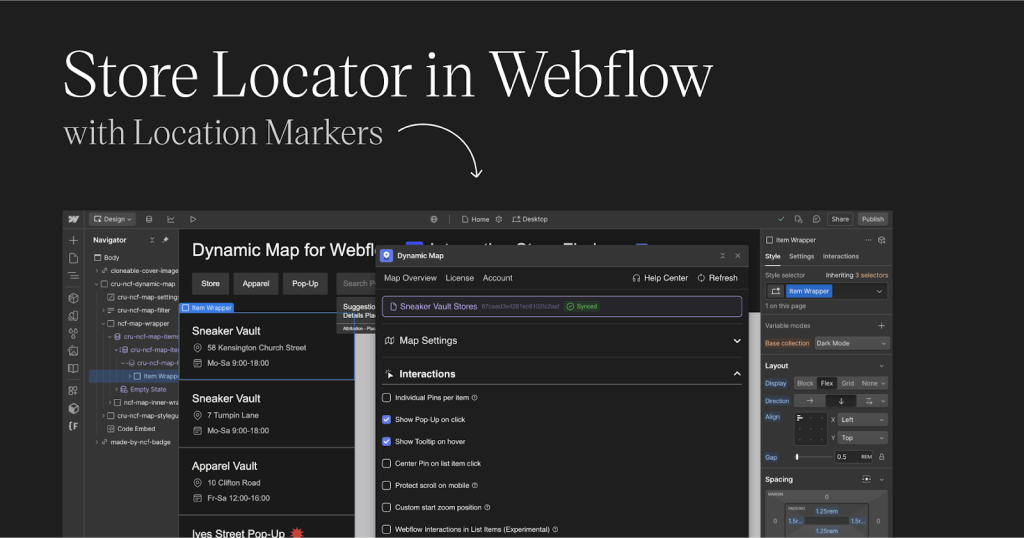
How to Create Interactive Maps in Webflow
How to Create an Interactive Map in Webflow: Multiple Locations Guide
Webflow excels at visual design, but creating a truly interactive map with multiple locations presents unique challenges. While Webflow offers some mapping capabilities, advanced features require workarounds and custom code. This comprehensive guide walks you through both the built-in methods and custom solutions.
Understanding Webflow’s Mapping Limitations
Webflow has two primary mapping approaches:
- 1. Native Map Block (Basic, single location only)
- 2. Custom Code Embed (Advanced, requires JavaScript)
- 3. Third-party Widgets (Limited availability)
Critical Limitation: Webflow’s native Map Block only supports **one location pin** out of the box. For multiple locations, you must use custom solutions.
Method 1: Using Webflow’s Native Map Block (Single Location Only)
For basic single-location needs, this method works perfectly.
Step 1: Add Map Block to Your Page
- 1. Open your Webflow Designer
- 2. Add Elements panel → Map Block from Components section
- 3. Place it in your layout
Step 2: Configure Single Location
- 1. Select the Map Block
- 2. Open Settings panel (D)
- 3. Enter your single address:
- yaml
- Address: 123 Main St, San Francisco, CA
- Zoom Level: 14
- Height: 400px
- 4. Customize appearance:
- css
  /* Webflow automatically applies these classes */
   .w-map {
     border-radius: 12px;
     overflow: hidden;
   }
Code language: CSS (css)
That’s it for single locations. But for multiple locations, continue reading.
Method 2: Custom Google Maps Embed (Multiple Locations)
This is the most common workaround for multiple locations.
Step 1: Create Your Map Outside Webflow
You need to create the map first, as Webflow doesn’t have a multi-location map builder.
Option A: Using Google My Maps
- 1. Go to [Google My Maps](https://www.google.com/maps/d/)
- 2. Create new map → Add multiple locations
- 3. Click Share → Enable public access
- 4. Click “Embed on my site” and copy iframe code
Option B: Programmatic Google Maps
Create a custom HTML file with this code:
html
<!DOCTYPE html>
<html>
<head>
    <style>
        #webflow-map {
            height: 500px;
            width: 100%;
            border-radius: 12px;
        }
    </style>
</head>
<body>
    <div id="webflow-map"></div>

    <script>
        function initMap() {
            // Your locations array
            const locations = [
                {lat: 37.7749, lng: -122.4194, title: "SF Office"},
                {lat: 34.0522, lng: -118.2437, title: "LA Branch"},
                {lat: 40.7128, lng: -74.0060, title: "NY Location"}
            ];

            const map = new google.maps.Map(
                document.getElementById('webflow-map'), {
                zoom: 4,
                center: locations[0],
                styles: [
                    // Custom map styling
                    {
                        "featureType": "administrative",
                        "elementType": "labels.text.fill",
                        "stylers": [{"color": "#444444"}]
                    }
                ]
            });

            // Add markers
            locations.forEach(location => {
                new google.maps.Marker({
                    position: location,
                    map: map,
                    title: location.title
                });
            });
        }
    </script>

    <!-- REPLACE WITH YOUR ACTUAL API KEY -->
    <script async defer
        src="https://maps.googleapis.com/maps/api/js?key=YOUR_API_KEY&callback=initMap">
    </script>
</body>
</html>
Code language: HTML, XML (xml)
Step 2: Get Google Maps API Key (Required)
This step trips up most Webflow users:
- 1. Create Google Cloud Account (requires credit card)
- 2. Enable Billing (free $200 monthly credit)
- 3. Enable APIs:
javascript
 // Must enable:
   // - Maps JavaScript API
// - Geocoding APICode language: JSON / JSON with Comments (json)- 4. Create and Restrict API Key:
javascript
// In Google Cloud Console:
// Application restrictions: HTTP referrers
// Add: *.webflow.io/* and yourdomain.com/*
// API restrictions: Maps JavaScript API only
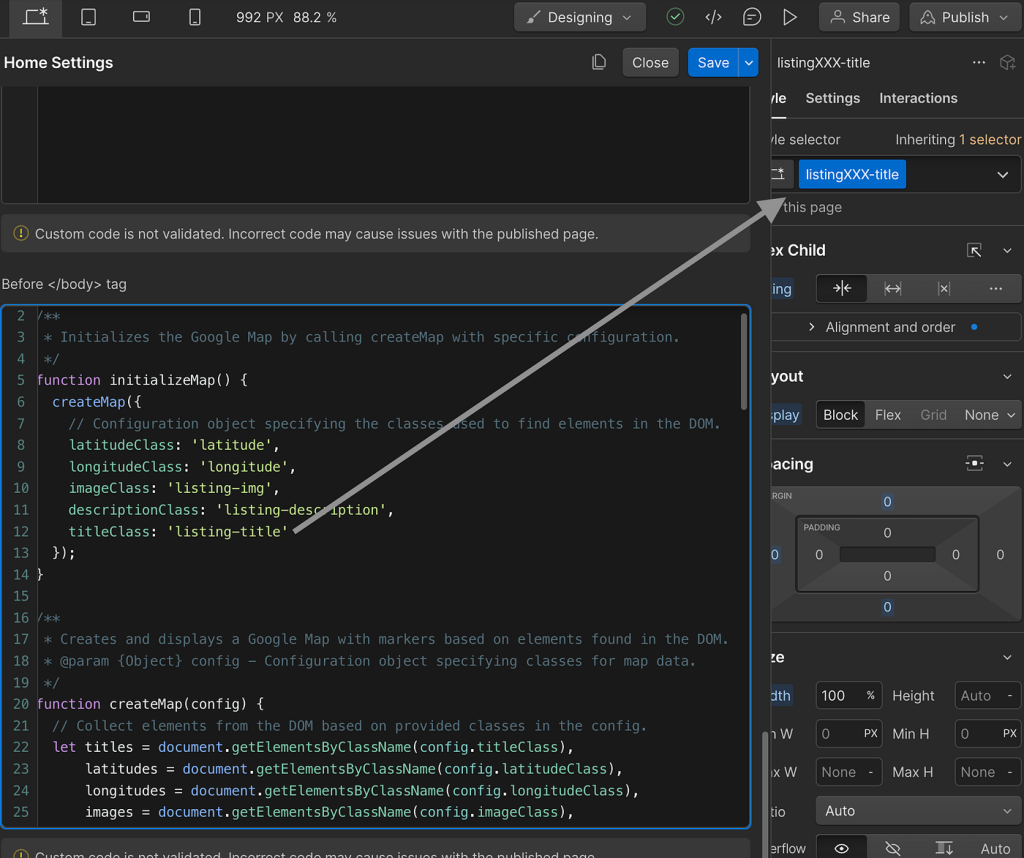
Code language: JSON / JSON with Comments (json)Step 3: Embed in Webflow
- 1. Add Embed Element:
- – Open Webflow Designer
- – Add Elements → Embed component (</>)
- – Place it where you want the map
- 2. Paste Custom Code:
html
 <!-- Google Maps Embed Code -->
   <div id="custom-webflow-map" style="width:100%;height:500px;"></div>

   <script>
   // Initialize when Webflow page loads
   window.Webflow && window.Webflow.push(function() {
       function initMap() {
           const map = new google.maps.Map(
               document.getElementById('custom-webflow-map'), {
               zoom: 10,
               center: {lat: 37.7749, lng: -122.4194},
               disableDefaultUI: false,
               zoomControl: true,
           });

           // Your marker data
           const markers = [
               {lat: 37.7749, lng: -122.4194, title: "Main Office"},
               {lat: 37.3382, lng: -121.8863, title: "San Jose Branch"},
           ];

           markers.forEach(marker => {
               new google.maps.Marker({
                   position: marker,
                   map: map,
                   title: marker.title
               });
           });
       }

       // Load Google Maps script
       if (!window.google || !window.google.maps) {
           const script = document.createElement('script');
           script.src = 'https://maps.googleapis.com/maps/api/js?key=YOUR_API_KEY&callback=initMap';
           script.async = true;
           document.head.appendChild(script);
       } else {
           initMap();
       }
   });
   </script>

   <style>
   /* Match Webflow's design system */
   #custom-webflow-map {
       border-radius: var(--radius-medium, 12px);
       overflow: hidden;
       box-shadow: var(--shadow-large, 0 10px 30px rgba(0,0,0,0.1));
   }

   #custom-webflow-map img {
       max-width: none !important;
   }
   </style>
Code language: HTML, XML (xml)- 3. Make Responsive:
Add this to your page’s Custom Code (Head):
css
style>
@media (max-width: 768px) {
#custom-webflow-map,
.w-embed iframe[src*="google.com/maps"] {
height: 300px !important;
}
}
</style>
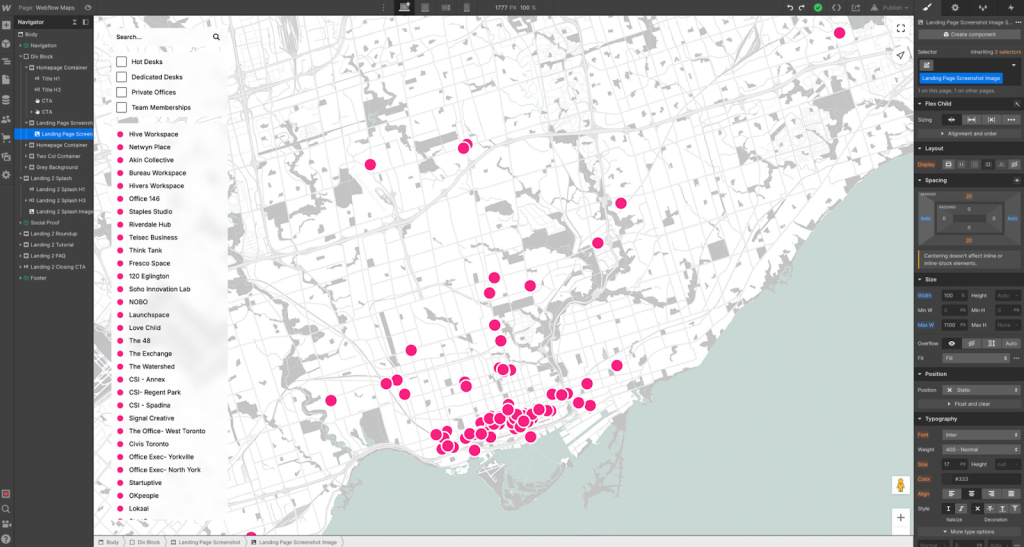
Code language: PHP (php)Method 3: Interactive Map with Webflow CMS
For dynamic locations that pull from CMS collections.
Step 1: Create CMS Collection
- 1. Create new Collection: Locations
- 2. Add fields:
- yaml
- – Name: Text
- – Address: Text
- – Latitude: Number
- – Longitude: Number
- – Description: Rich Text
Step 2: Create Collection Template
- 1. Add to page: Collection List wrapper
- 2. Add script to pull CMS data:
javascript
<script>
   window.Webflow && window.Webflow.push(function() {
       // Get CMS items
       const locationItems = document.querySelectorAll('[data-location-item]');
       const locations = [];

       locationItems.forEach(item => {
           const lat = item.getAttribute('data-latitude');
           const lng = item.getAttribute('data-longitude');
           const title = item.getAttribute('data-title');

           if (lat && lng) {
               locations.push({
                   lat: parseFloat(lat),
                   lng: parseFloat(lng),
                   title: title
               });
           }
       });

       // Initialize map with CMS locations
       if (locations.length > 0) {
           initMapWithLocations(locations);
       }
   });
   </script>
Code language: HTML, XML (xml)
Step 3: Add Data Attributes to CMS Items
In your Collection List design:
html
<div
    data-location-item
    data-latitude="{{item.latitude}}"
    data-longitude="{{item.longitude}}"
    data-title="{{item.name}}">
    <!-- Your CMS item design here -->
</div>Code language: HTML, XML (xml)
Method 4: Using Third-Party Map Widgets
Several widgets exist but have limitations:
Finsweet Attributes (Free)
html
<!-- Add to your page -->
<div fs-map-element="map" style="height: 500px;"></div>

<!-- Add to page settings -->
<script src="https://cdn.jsdelivr.net/npm/@finsweet/attributes-map@1/map.js"></script>
Code language: HTML, XML (xml)
Limitations: Basic functionality, limited customization.
Mapbox with Webflow
- 1. Get Mapbox access token
- 2. Add custom code:
- javascript
mapboxgl.accessToken = 'YOUR_MAPBOX_TOKEN';
const map = new mapboxgl.Map({
    container: 'map',
    style: 'mapbox://styles/mapbox/streets-v11',
    center: [-74.5, 40],
    zoom: 9
});Code language: JavaScript (javascript)
Common Webflow Map Problems & Solutions
- ❌ Problem 1: Map Not Loading on Published Site**
- Solution: API key issues. Check:
- – Billing enabled on Google Cloud
- – API key restrictions include your domain
- – Correct APIs enabled (JavaScript & Geocoding)
- ❌ Problem 2: Map Breaks Mobile Layout**
- Solution: Add responsive CSS:
- css
/* In page's Custom Code */
@media (max-width: 478px) {
    .w-embed iframe,
    #custom-map-container {
        height: 250px !important;
        min-height: 250px !important;
    }
}Code language: CSS (css)- ❌ Problem 3: Map Loads Slowly
- Solution: Lazy load implementation:
- javascript
// Add to page's Footer Code
document.addEventListener('DOMContentLoaded', function() {
    const mapContainer = document.getElementById('map-container');
    const observer = new IntersectionObserver((entries) => {
        if (entries[0].isIntersecting) {
            loadMapScript();
            observer.unobserve(mapContainer);
        }
    });
    observer.observe(mapContainer);
});Code language: JavaScript (javascript)- ❌ Problem 4: Custom Markers Not Showing
- Solution: Ensure proper image URLs and check CORS:
- javascript
// Custom marker example
const icon = {
    url: 'https://assets.yourdomain.com/marker.png',
    scaledSize: new google.maps.Size(40, 40),
    origin: new google.maps.Point(0, 0),
    anchor: new google.maps.Point(20, 40)
};Code language: JavaScript (javascript)
Design Considerations for Webflow Maps
Matching Webflow’s Aesthetics
css
/* Add to your page's Custom Code */
.webflow-map {
    --map-radius: 16px;
    --map-shadow: 0 20px 40px rgba(0,0,0,0.1);

    border-radius: var(--map-radius);
    overflow: hidden;
    box-shadow: var(--map-shadow);
    margin: 2rem 0;
}

/* Dark mode support */
@media (prefers-color-scheme: dark) {
    .webflow-map {
        filter: brightness(0.9) contrast(1.1);
    }
}Code language: CSS (css)
Interactive Elements Integration
Create tooltips that match Webflow’s interactions:
javascript
// Sync with Webflow interactions
$('[data-map-marker]').on('click', function() {
    // Trigger Webflow interaction
    window.Webflow.require('ix2').trigger(this);
});Code language: JavaScript (javascript)
The Webflow Map Challenge: Why It’s So Complex
Consider what you’re actually building:
- 1. Google Cloud Account Management: API keys, billing, quotas
- 2. Custom JavaScript Development: Writing and debugging map code
- 3. Responsive Design Implementation: Mobile optimization
- 4. CMS Integration Complexity: Dynamic data handling
- 5. Performance Optimization: Loading speed concerns
- 6. Design Consistency: Matching Webflow’s visual standards
The Webflow-Friendly Solution: MapsFun.com
What if you could create stunning interactive maps that perfectly match your Webflow site’s design—without writing a single line of code or managing API keys?
Why MapsFun.com is Perfect for Webflow Users:
- 1.Visual Designer Alignment: Create maps that match your Webflow design system
- 2.No Code Required: Visual editor instead of JavaScript debugging
- 3.Perfect Embeds: Clean code that works flawlessly in Webflow’s embed element
- 4.CMS-Ready: Easily connect to your Webflow CMS data
3-Step Webflow Integration:
- Step 1: Design your map at [MapsFun.com](https://mapsfun.com)
- – Use our visual editor (feels familiar to Webflow users)
- – Customize colors to match your Webflow style guide
- – Add unlimited locations via search or import
- Step 2: Copy your optimized embed code
- Step 3: In Webflow Designer:
- 1. Add an Embed element (</>)
- 2. Paste MapsFun code
- 3. Style container with Webflow’s native tools
html
<!-- MapsFun Webflow Embed Example -->
<div class="mapsfun-container" style="width:100%;padding-top:56.25%;position:relative;">
  <iframe
    src="https://app.mapsfun.com/embed/your-map-id"
    style="position:absolute;top:0;left:0;width:100%;height:100%;border:none;"
    loading="lazy"
    title="Interactive Location Map">
  </iframe>
</div>
Code language: HTML, XML (xml)
Advanced Webflow Integration Features:
- ✅ Design Token Sync: Import Webflow colors as map themes
- ✅ CMS Data Import: Connect to your Webflow Locations collection
- ✅ Interaction Ready: Works with Webflow’s native interactions
- ✅ Performance Optimized: Faster than custom-coded solutions
- ✅ Zero Maintenance: We handle all API and backend updates
Feature Comparison: Webflow Mapping Solutions
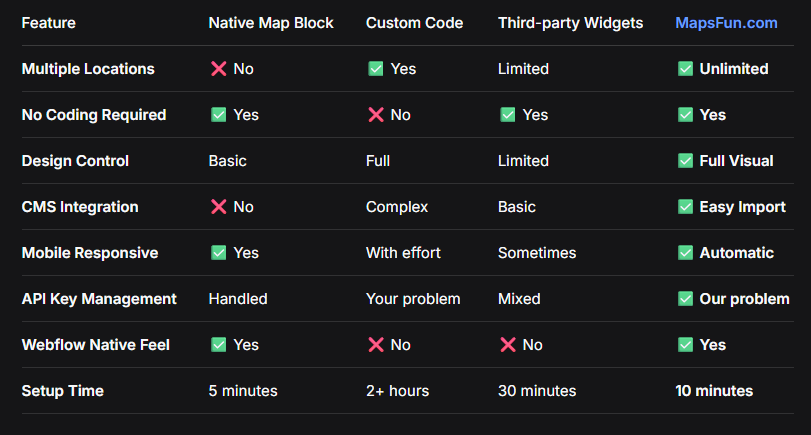
Conclusion: The Smart Choice for Webflow Designers
While Webflow provides a native Map Block for basic needs and supports custom code embeds for advanced functionality, creating a truly polished, interactive multi-location map requires significant technical work — from Google Cloud configuration and API key management to custom JavaScript development and responsive design testing.
For Webflow designers and website owners who value both aesthetics and functionality, MapsFun.com offers the perfect solution. Instead of leaving the visual design perfection of Webflow to wrestle with technical code, you can create maps that look and feel native to your Webflow site through an intuitive visual editor.
Stop compromising between design quality and functionality. Whether you’re building a portfolio site, business website, or e-commerce store in Webflow, MapsFun.com delivers professional interactive mapping that enhances your design rather than complicating it. Visit MapsFun.com to create your first Webflow-compatible map in minutes—no coding, no API keys, and no design compromises required.