How to Embed Google Maps on Wix
How to Add a Custom Google Map with Multiple Locations to Your Wix Site
Want to showcase your multiple store locations, event venues, or service areas directly on your Wix website using a custom Google Map? While Wix has a basic map element, it’s limited to a single pin. Creating a true multi-location Google Map requires a technical workaround. This guide will walk you through the manual process of embedding a custom Google Map using your own API key and Wix Velo.
This method offers full customization but involves creating a Google Cloud project, handling API keys, and writing JavaScript code. It’s a developer-focused approach.
Method 1: The Manual Google Maps API & Wix Velo Method
This approach gives you complete control but comes with significant technical complexity.
Step 1: Set Up Your Google Maps API Key
This is the most critical and complex prerequisite.
- 1. Go to the [Google Cloud Console].
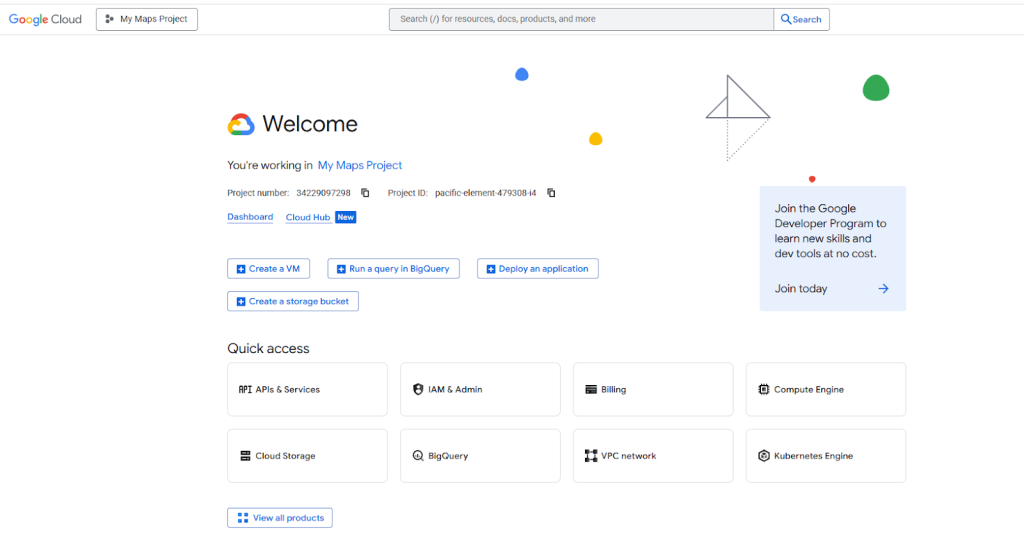
- 2. Create a new project and, importantly, **enable billing**. Google provides a $200 monthly credit, which typically covers most small website maps.
- 3. Enable the Required APIs: Navigate to “APIs & Services > Library” and enable these two services:
- Maps JavaScript API(renders the map)
- Geocoding API(converts addresses to coordinates)
- 4. Create and Restrict Your API Key: Go to “APIs & Services > Credentials”. Click “Create Credentials” and choose “API key”. Immediately restrict this key to the “Maps JavaScript API” and add your Wix site’s URL (e.g., `https://yourusername.wixsite.com/yoursite`) under “HTTP referrers” to prevent unauthorized use.
You must enable the correct APIs in your Google Cloud project.
Step 2: Add a Map Container to Your Wix Page
1. In the Wix Editor, navigate to the page for your map.
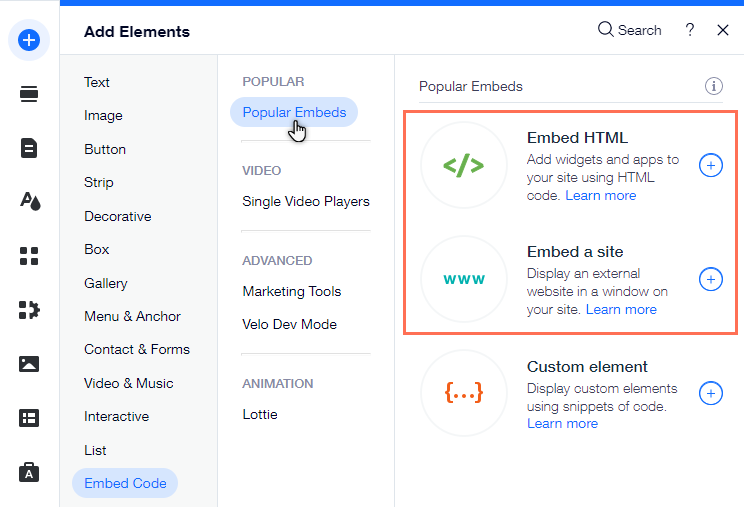
2. Click Add (+) > Embed > HTML iframe.
3. Drag the element onto your page and stretch it to your desired size. This blank box will host your custom Google Map. Note its element ID (e.g., `#html1`).
The HTML iframe element in Wix acts as a container for your custom map.
Step 3: Inject the Google Map Code Using Wix Velo
Now for the coding part. You’ll use Wix Velo to dynamically create the map and send it to the iframe.
1. In the Wix Editor, enable Dev Mode (Turn on Dev Mode > Enable Dev Mode).
2. Click on Public & Backend in the site menu to open the Velo code panel.3. In your page’s code (e.g., `home.js`), paste the following JavaScript. You must replace `YOUR_API_KEY` with the restricted key you created in Step 1.
javascript
$w.onReady(function () {
    // Get the HTML iframe element. Change '#html1' to your element's ID.
    const mapContainer = $w('#html1');

    // Your list of locations [Name, Address]
    const locations = [
        ['Downtown Store', '123 Main St, New York, NY'],
        ['Uptown Cafe', '456 Park Ave, New York, NY'],
        ['Westside Warehouse', '789 Broadway, New York, NY']
    ];

    // Function to get Lat/Lng from an address
    function geocodeAddress(address) {
        const geocoder = new google.maps.Geocoder();
        return new Promise((resolve, reject) => {
            geocoder.geocode({ 'address': address }, (results, status) => {
                status === 'OK' ? resolve(results[0].geometry.location) : reject('Geocode failed: ' + status);
            });
        });
    }

    // Build the map after all addresses are geocoded
    Promise.all(locations.map(location => geocodeAddress(location[1])))
        .then(coordinates => {
            // Create the HTML/JS content for the iframe
            const mapHtml = `
                <!DOCTYPE html>
                <html>
                <head>
                    <style>#map { height: 100%; width: 100%; border: none; }</style>
                </head>
                <body>
                    <div id="map"></div>
                    <script src="https://maps.googleapis.com/maps/api/js?key=YOUR_API_KEY"></script>
                    <script>
                        const map = new google.maps.Map(document.getElementById('map'), {
                            zoom: 10
                        });

                        const bounds = new google.maps.LatLngBounds();
                        const locations = ${JSON.stringify(locations)};
                        const coordinates = ${JSON.stringify(coordinates)};

                        coordinates.forEach((coord, i) => {
                            new google.maps.Marker({
                                position: coord,
                                map: map,
                                title: locations[i][0]
                            });
                            bounds.extend(coord); // Extend bounds for each marker
                        });

                        map.fitBounds(bounds); // Auto-zoom to show all markers
                    </script>
                </body>
                </html>
            `;
            // Send the complete map to the Wix HTML iframe
            mapContainer.postMessage(mapHtml);
        })
        .catch(error => console.error("Map Error: ", error));
});
Code language: PHP (php)
This code geocodes your addresses, creates a Google Map with markers, and automatically adjusts the view to fit all locations.
Why This Method is Problematic for Most Wix Users
While powerful, this DIY approach is fraught with challenges:
- API Key Management: You are responsible for securing your API key. A leaked, unrestricted key can lead to massive unexpected charges on your Google Cloud bill.
- Coding Complexity: The solution requires a solid grasp of JavaScript, Promises, and the Google Maps API lifecycle. Debugging errors can be time-consuming.
- Wix-Specific Limitations: Using `postMessage` with an HTML iframe is a workaround that can sometimes lead to display issues or slow loading times.
- Design Inflexibility: Simply changing a marker icon or the map’s color scheme requires diving back into the code and redeploying.
Skip the Complexity: Use MapsFun.com for a Perfect Wix Map in Minutes
Why deal with the hassle of API keys, code, and potential billing issues? There’s a professional, codeless alternative designed specifically for this task.
MapsFun.com eliminates every single one of these pain points:
- 1. Truly No-Code: Create your map through an intuitive visual editor. Search, click, and add pins—no coding required.
- 2. No API Keys or Billing: We manage all the backend infrastructure. You just design your map; we handle the technical heavy lifting.
- 3. Effortless Wix Integration: Once your multi-location map is ready, you simply copy the provided embed code and paste it into the same Wix HTML iframe element. It works instantly.
- 4. Superior Customization: Easily apply custom map styles, upload your own marker icons, and design rich info windows with text and images — all through a simple point-and-click interface.
Stop wrestling with Google Cloud and Velo code. Create a stunning, high-performance, multi-location Google Map for your Wix site in just a few clicks with MapsFun.com.