How to Plot Map with Multiple Locations (Step-by-Step)
How to Plot a Map with Multiple Locations: Complete Guide with Code Examples
Creating a map with multiple locations is essential for businesses showing store networks, travelers planning itineraries, researchers visualizing data, or anyone needing to display geographical information. This comprehensive guide walks you through every approach—from manual methods to automated solutions—complete with working code snippets and visual examples

Why You Need Multi-Location Maps
Before we dive into the technical implementation, let’s understand why plotting multiple locations matters:
- – Business Intelligence: Visualize customer distribution, competitor locations, or market coverage
- – Operational Efficiency: Optimize delivery routes, plan service areas, or manage field teams
- – User Engagement: Provide interactive store locators, event maps, or travel guides
- – Data Analysis: Spot geographical patterns, clusters, or trends in spatial data
Method 1: The Manual Approach with Google Maps
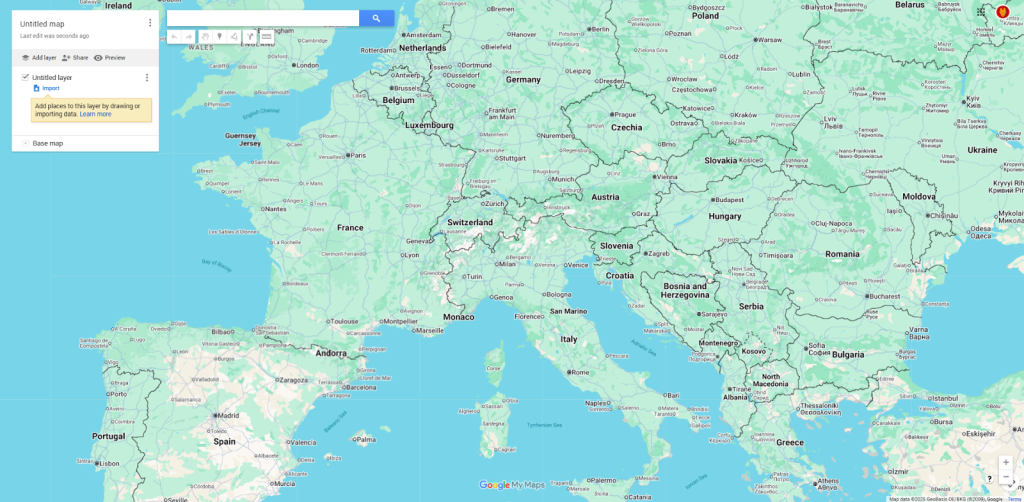
Using Google My Maps (Free but Limited)
For quick, one-time maps with fewer than 50 locations, Google My Maps offers a straightforward solution.
Step-by-Step Process:
- 1. Access Google My Maps at [maps.google.com/mymaps](https://maps.google.com/mymaps)
- 2. Click “Create a New Map”
- 3. Manually search and add each location:
- 4. Customize markers with colors and icons
- 5. Export or share your map via link or embed code
- Pros:
– Completely free - – No technical skills required
- – Integrated with Google ecosystem
Cons:
- – Time-consuming for more than 20 locations
- – No automation capabilities
- – Limited customization options
- – Manual updates required
Method 2: The Developer’s Approach with Google Maps API
Complete Technical Implementation
For full control and customization, the Google Maps JavaScript API provides professional-grade functionality. Here’s the complete working solution.
Prerequisites:
- – Google Cloud Platform account
- – Basic HTML/CSS/JavaScript knowledge
- – Enabled Maps JavaScript API
Step 1: HTML Foundation
html
<!DOCTYPE html>
<html>
<head>
    <title>Interactive Multi-Location Map</title>
    <meta name="viewport" content="width=device-width, initial-scale=1.0">
    <style>
        #map-container {
            width: 100%;
            max-width: 1200px;
            margin: 0 auto;
            padding: 20px;
        }

        #map {
            height: 600px;
            width: 100%;
            border-radius: 10px;
            box-shadow: 0 4px 12px rgba(0,0,0,0.1);
        }

        .controls {
            background: #f8f9fa;
            padding: 20px;
            border-radius: 8px;
            margin-bottom: 20px;
            display: flex;
            gap: 15px;
            flex-wrap: wrap;
        }

        .location-card {
            background: white;
            border: 1px solid #dee2e6;
            border-radius: 8px;
            padding: 15px;
            margin: 10px 0;
            cursor: pointer;
            transition: all 0.3s;
        }

        .location-card:hover {
            transform: translateX(5px);
            box-shadow: 0 3px 10px rgba(0,0,0,0.1);
        }
    </style>
</head>
<body>
    <div id="map-container">
        <h1>Store Locator Map</h1>
        <div class="controls">
            <input type="text" id="search" placeholder="Search locations..." style="flex-grow: 1; padding: 10px;">
            <select id="category-filter" style="padding: 10px;">
                <option value="all">All Categories</option>
                <option value="retail">Retail Stores</option>
                <option value="service">Service Centers</option>
                <option value="warehouse">Warehouses</option>
            </select>
        </div>

        <div id="map"></div>

        <div id="locations-list" style="margin-top: 30px;">
            <h3>All Locations</h3>
            <!-- Location cards will be generated here -->
        </div>
    </div>

    <!-- Load Google Maps API -->
    <script src="https://maps.googleapis.com/maps/api/js?key=YOUR_API_KEY&callback=initMap&libraries=places" async defer></script>

    <script>
        // Your JavaScript code will go here
    </script>
</body>
</html>
Code language: HTML, XML (xml)
Step 2: JavaScript Implementation with Full Features
javascript
// Store all locations data
const locations = [
    {
        id: 1,
        name: "Downtown Store",
        address: "123 Main Street, New York, NY",
        category: "retail",
        lat: 40.7128,
        lng: -74.0060,
        phone: "(212) 555-1234",
        hours: "9AM-9PM Mon-Sat",
        description: "Flagship store with full product range"
    },
    {
        id: 2,
        name: "Brooklyn Service Center",
        address: "456 Park Ave, Brooklyn, NY",
        category: "service",
        lat: 40.6782,
        lng: -73.9442,
        phone: "(718) 555-5678",
        hours: "8AM-6PM Weekdays",
        description: "Authorized repair and service"
    },
    {
        id: 3,
        name: "Queens Warehouse",
        address: "789 Queens Blvd, Queens, NY",
        category: "warehouse",
        lat: 40.7282,
        lng: -73.7949,
        phone: "(718) 555-9012",
        hours: "6AM-4PM Mon-Fri",
        description: "Main distribution center"
    },
    // Add more locations as needed
];

// Global variables
let map;
let markers = [];
let infoWindow;
let bounds;

function initMap() {
    // Initialize map centered on average location
    const center = calculateCenter(locations);

    map = new google.maps.Map(document.getElementById('map'), {
        zoom: 10,
        center: center,
        mapTypeControl: true,
        streetViewControl: false,
        fullscreenControl: true
    });

    infoWindow = new google.maps.InfoWindow();
    bounds = new google.maps.LatLngBounds();

    // Create markers for all locations
    createMarkers();

    // Initialize search and filter functionality
    initializeControls();

    // Create location list
    renderLocationList();
}

function calculateCenter(locationsArray) {
    if (locationsArray.length === 0) {
        return { lat: 40.7128, lng: -74.0060 }; // Default to NYC
    }

    const total = locationsArray.reduce((acc, location) => {
        return {
            lat: acc.lat + location.lat,
            lng: acc.lng + location.lng
        };
    }, { lat: 0, lng: 0 });

    return {
        lat: total.lat / locationsArray.length,
        lng: total.lng / locationsArray.length
    };
}

function createMarkers() {
    // Clear existing markers
    markers.forEach(marker => marker.setMap(null));
    markers = [];
    bounds = new google.maps.LatLngBounds();

    // Get current filter value
    const filterValue = document.getElementById('category-filter').value;

    locations.forEach(location => {
        // Apply category filter
        if (filterValue !== 'all' && location.category !== filterValue) {
            return;
        }

        // Create marker
        const marker = new google.maps.Marker({
            position: { lat: location.lat, lng: location.lng },
            map: map,
            title: location.name,
            icon: getMarkerIcon(location.category),
            animation: google.maps.Animation.DROP
        });

        // Store reference to location data
        marker.locationData = location;

        // Add click listener
        marker.addListener('click', () => {
            showInfoWindow(marker);
        });

        // Add to bounds for auto-zoom
        bounds.extend(marker.getPosition());

        markers.push(marker);
    });

    // Auto-zoom to show all markers
    if (markers.length > 0) {
        map.fitBounds(bounds);
        // Add a little padding
        const padding = 50; // pixels
        map.fitBounds(bounds, padding);
    }
}

function getMarkerIcon(category) {
    const icons = {
        retail: {
            url: 'https://maps.google.com/mapfiles/ms/icons/blue-dot.png',
            scaledSize: new google.maps.Size(40, 40)
        },
        service: {
            url: 'https://maps.google.com/mapfiles/ms/icons/green-dot.png',
            scaledSize: new google.maps.Size(40, 40)
        },
        warehouse: {
            url: 'https://maps.google.com/mapfiles/ms/icons/red-dot.png',
            scaledSize: new google.maps.Size(40, 40)
        }
    };

    return icons[category] || icons.retail;
}

function showInfoWindow(marker) {
    const location = marker.locationData;

    const content = `
        <div class="info-window">
            <h3 style="margin-top: 0; color: #1a73e8;">${location.name}</h3>
            <p><strong>Address:</strong> ${location.address}</p>
            <p><strong>Phone:</strong> ${location.phone}</p>
            <p><strong>Hours:</strong> ${location.hours}</p>
            <p>${location.description}</p>
            <button onclick="getDirections(${location.lat}, ${location.lng})"
                    style="background: #1a73e8; color: white; border: none; padding: 8px 16px; border-radius: 4px; cursor: pointer; margin-top: 10px;">
                Get Directions
            </button>
        </div>
    `;

    infoWindow.setContent(content);
    infoWindow.open(map, marker);
}

function getDirections(lat, lng) {
    const url = `https://www.google.com/maps/dir/?api=1&destination=${lat},${lng}`;
    window.open(url, '_blank');
}

function initializeControls() {
    // Search functionality
    document.getElementById('search').addEventListener('input', function(e) {
        const searchTerm = e.target.value.toLowerCase();

        markers.forEach(marker => {
            const location = marker.locationData;
            const matches = location.name.toLowerCase().includes(searchTerm) ||
                           location.address.toLowerCase().includes(searchTerm) ||
                           location.description.toLowerCase().includes(searchTerm);

            marker.setVisible(matches);
        });

        renderLocationList();
    });

    // Category filter
    document.getElementById('category-filter').addEventListener('change', function() {
        createMarkers();
        renderLocationList();
    });
}

function renderLocationList() {
    const container = document.getElementById('locations-list');
    const searchTerm = document.getElementById('search').value.toLowerCase();
    const filterValue = document.getElementById('category-filter').value;

    // Filter visible markers
    const visibleLocations = locations.filter(location => {
        const matchesSearch = location.name.toLowerCase().includes(searchTerm) ||
                            location.address.toLowerCase().includes(searchTerm) ||
                            location.description.toLowerCase().includes(searchTerm);

        const matchesFilter = filterValue === 'all' || location.category === filterValue;

        return matchesSearch && matchesFilter;
    });

    // Generate HTML
    const html = visibleLocations.map(location => `
        <div class="location-card" onclick="panToLocation(${location.lat}, ${location.lng})">
            <h4 style="margin: 0 0 10px 0; color: #1a73e8;">${location.name}</h4>
            <p style="margin: 5px 0; color: #666;">${location.address}</p>
            <p style="margin: 5px 0; font-size: 0.9em;">${location.description}</p>
            <div style="display: flex; justify-content: space-between; margin-top: 10px; font-size: 0.9em;">
                <span>📞 ${location.phone}</span>
                <span>🕒 ${location.hours}</span>
            </div>
        </div>
    `).join('');

    container.innerHTML = `
        <h3>${visibleLocations.length} Location${visibleLocations.length !== 1 ? 's' : ''} Found</h3>
        ${html}
    `;
}

function panToLocation(lat, lng) {
    map.panTo({ lat, lng });
    map.setZoom(15);

    // Find and highlight the corresponding marker
    const marker = markers.find(m =>
        m.locationData.lat === lat && m.locationData.lng === lng
    );

    if (marker) {
        showInfoWindow(marker);
        marker.setAnimation(google.maps.Animation.BOUNCE);
        setTimeout(() => {
            marker.setAnimation(null);
        }, 1500);
    }
}

// Handle window resize
window.addEventListener('resize', () => {
    if (map) {
        google.maps.event.trigger(map, 'resize');
    }
});

// Initialize when ready
window.initMap = initMap;
Code language: JavaScript (javascript)
Step 3: Advanced Features to Add
Marker Clustering for Large Datasets:
javascript
// Add this to your initMap function after creating markers
if (locations.length > 50) {
    const markerCluster = new MarkerClusterer(map, markers, {
        imagePath: 'https://developers.google.com/maps/documentation/javascript/examples/markerclusterer/m',
        maxZoom: 15,
        gridSize: 60
    });
}
Code language: JavaScript (javascript)
Heatmap Visualization:
javascript
// Enable the visualization library in your script tag
// Add &libraries=visualization to the API URL

function createHeatmap() {
    const heatmapData = locations.map(location =>
        new google.maps.LatLng(location.lat, location.lng)
    );

    const heatmap = new google.maps.visualization.HeatmapLayer({
        data: heatmapData,
        map: map,
        radius: 30,
        opacity: 0.6
    });
}
Code language: JavaScript (javascript)
Step 4: Deploying Your Map
- 1. Get an API Key:
- – Go to [Google Cloud Console](https://console.cloud.google.com)
- – Create a new project
- – Enable Maps JavaScript API
- – Create credentials (API key)
- – Restrict the key to your domain
2. Replace `YOUR_API_KEY` in the HTML file with your actual API key
3. Upload to a web server or use local development server
The Reality of This Approach
While the code above provides a fully functional multi-location map, this approach comes with significant challenges:
Technical Hurdles:
- 1. API Complexity: Google Maps API has a steep learning curve
- 2. Billing Setup: Mandatory Google Cloud billing account setup
- 3. Key Management: API keys require careful security management
- 4. Cross-Browser Issues: Testing across different browsers is necessary
- 5. Mobile Responsiveness: Additional code needed for mobile optimization
Maintenance Burden:
– Code Updates: Every feature addition requires coding
– Bug Fixes: You’re responsible for debugging
– API Changes: Google occasionally updates their API, breaking existing code
– Performance Optimization: Large datasets need custom optimization
Cost Considerations:
`javascript
// Example of hidden costs

const monthlyCosts = {

    apiCalls: 'Varies by usage',

    geocoding: '$5 per 1000 requests',

    support: 'Developer time',

    maintenance: 'Ongoing hours',

    total: 'Unpredictable monthly bill'

};Code language: JavaScript (javascript)
Time Investment:
- – Initial Development: 8-40 hours for a basic map
- – Testing & Debugging: 4-16 hours
- – Mobile Optimization: 4-8 hours
- – Ongoing Maintenance: 2-8 hours monthly
Common Problems You’ll Encounter
- 1. Quota Limits: Exceeding free tier limits
- 2. Geocoding Failures: Addresses that won’t convert to coordinates
- 3. Performance Issues: Slow loading with 100+ markers
- 4. Mobile Problems: Touch events not working correctly
- 5. Browser Inconsistencies: Different behavior across browsers
The Professional Solution: MapsFun.com
After walking through this technical implementation, you might be wondering: “Is there an easier way?”
The answer is yes.
MapsFun.com provides everything we just built—and more—without writing a single line of code.
What MapsFun.com Offers:
Visual Editor:
- – Click-to-add points interface
- – Drag-and-drop marker placement
- – Real-time preview of your map
Built-in Features:
- – Custom marker icons and colors
- – Multiple map styles (road, satellite, terrain)
- – Rich info windows with images and links
- – Automatic address geocoding
- – Category filtering and search
- – Mobile-responsive design out of the box
Time Comparison:
- – Traditional Method: 20+ hours of development time
- – MapsFun.com: 5 minutes to create the same map
Cost Comparison:
– API Development: Unpredictable costs + developer fees
– MapsFun.com: Fixed, transparent pricing starting at free
How It Works:
1. Sign up for a free account
2. Click “Create New Map”
3. Add locations by address search or CSV import
4. Customize appearance with visual tools
5. Copy embed code and paste into your website
html
<!-- MapsFun.com embed code example -->

<div id="mapsfun-container" style="width: 100%; height: 600px;"></div>

<script src="https://app.mapsfun.com/embed/your-map-id"></script>Code language: HTML, XML (xml)
Why Choose MapsFun.com Over Manual Coding?
1. No Technical Knowledge Required: Create professional maps without coding
2. Instant Deployment: From creation to live map in minutes
3. Automatic Updates: Change locations anytime, no code changes needed
4. Built-in Best Practices: SEO optimization, mobile responsiveness, and fast loading
5. Predictable Costs: No surprise API bills or development costs
Perfect For:
- – Business owners needing store locators
- – Event planners creating venue maps
- – Travel bloggers showcasing destinations
- – Real estate agents displaying properties
- – Teachers creating educational maps
- – Anyone who needs a map quickly and professionally
Conclusion: Choose Your Path Wisely
You now have two clear paths to create a map with multiple locations:
Path 1: The Technical Route
- – Full control and customization
- – Requires coding skills and time investment
- – Ongoing maintenance responsibility
- – Unpredictable costs and complexity
Path 2: The Simplified Solution with MapsFun.com
- – Professional results in minutes
- – No coding required
- – Automatic updates and maintenance
- – Predictable, transparent pricing
For most businesses and individuals, the choice is clear. Unless you have specific, complex requirements that absolutely need custom coding, MapsFun.com provides everything you need to create beautiful, functional multi-location maps without the technical headache.
The code examples in this article demonstrate what’s possible—but they also show how much work is involved. With MapsFun.com, you get all these features (and more) through an intuitive visual interface.
Ready to create your multi-location map? Visit MapsFun.com to start building your map in minutes—no coding required.