How to Add Multiple Points on Google Maps (Step-by-Step Guide in 2025)
How to Add Multiple Points on Google Maps: A Developer’s Guide
Plotting multiple locations on a Google Map for your website is a common need, whether you’re showing store locations, event venues, or service areas. While Google’s platform is powerful, the process isn’t always straightforward. This guide will walk you through the official method, which requires some technical know-how.
Method: Using the Google Maps JavaScript API
This is the most flexible and powerful way to create a custom multi-point map. Follow these steps carefully.
Step 1: Get a Google Maps API Key
This is the most critical and often the most confusing step for beginners.
- 1. Go to the Google Cloud Console
- 2. Create a new project or select an existing one.
- 3. Enable Billing: You must link a billing account. Google provides a $200 monthly credit, which is more than enough for most small to medium websites.
- 4. Enable the APIs: Navigate to “APIs & Services > Library” and enable the following:
- Maps JavaScript API
- Geocoding API (needed to convert addresses to coordinates if you’re not using lat/lng)
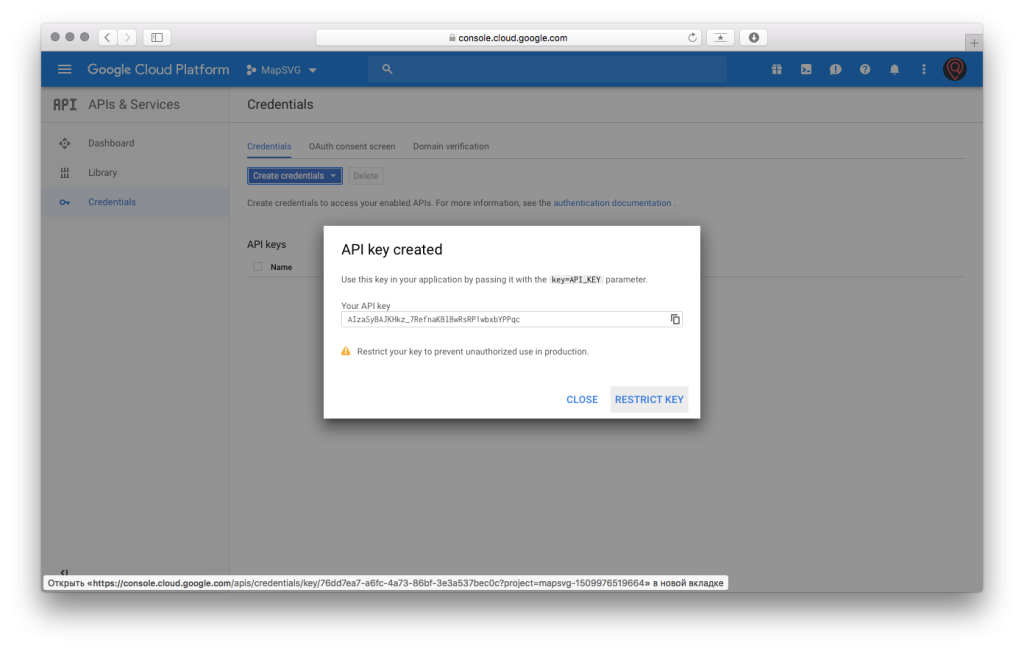
- 5. Create an API Key: Go to “APIs & Services > Credentials”. Click “Create Credentials” and choose “API key”. For security, restrict this key to the “Maps JavaScript API” and “Geocoding API”.
Step 2: Build the HTML and JavaScript Page
Create a new HTML file (e.g., `mymap.html`) and paste the following code. This code creates a map, defines an array of locations, and loops through them to place markers.
html
<!DOCTYPE html>
<html>
<head>
    <title>Our Store Locations</title>
    <!-- Load the Maps JS API with your key -->
    <script async defer src="https://maps.googleapis.com/maps/api/js?key=YOUR_API_KEY&callback=initMap"></script>
    <style>
        /* Set the size of the map div */
        #map {
            height: 500px;
            width: 100%;
            border: 1px solid #ccc;
        }
    </style>
</head>
<body>
    <h2>Find Us Here</h2>
    <div id="map"></div>

    <script>
        // The initMap function is called once the API is loaded
        function initMap() {
            // Define the initial center point of the map
            const myLatLng = { lat: 40.7128, lng: -74.0060 }; // NYC Coordinates

            // Create a new map instance
            const map = new google.maps.Map(document.getElementById("map"), {
                zoom: 11,
                center: myLatLng,
            });

            // Define your locations as an array of arrays [Title, Lat, Lng]
            const locations = [
                ['Manhattan Store', 40.7614, -73.9776],
                ['Brooklyn Store', 40.6782, -73.9442],
                ['Warehouse', 40.7061, -74.0088]
            ];

            // Create a single InfoWindow to be reused
            const infowindow = new google.maps.InfoWindow();

            // Loop through the locations array and add a marker for each
            locations.forEach(([title, lat, lng]) => {
                // Create a new marker for each location
                const marker = new google.maps.Marker({
                    position: { lat, lng },
                    map: map, // Attach it to our map
                    title: title, // Shows on hover
                });

                // Add a click listener to each marker to show its title
                marker.addListener("click", () => {
                    infowindow.setContent(`<strong>${title}</strong>`); // HTML content for the popup
                    infowindow.open(map, marker);
                });
            });
        }
    </script>
</body>
</html>
Code language: HTML, XML (xml)
Replace `YOUR_API_KEY` in the script tag with the actual restricted API key you generated in Step 1.
Step 3: Embed the Map on Your Site
If your website is a simple HTML site, you can just upload this file. For Content Management Systems (CMS) like WordPress, Wix, or Squarespace, you will need to find an “HTML” or “Embed Code” block and paste the entire code snippet there.
The Reality of This Approach
While this method gives you full control, it’s clear that it comes with significant overhead:
- Technical Barrier: You need to be comfortable with code, APIs, and Google Cloud.
- Billing Setup: The requirement to enable billing, even with a free tier, is a hurdle for many.
- Security Risks: Improperly secured API keys can lead to massive bills.
- Manual Data Entry: Adding or removing locations requires manually editing the code and redeploying.
Create Your Map in Minutes, Not Hours
What if you could achieve the same result without writing a single line of code or touching the Google Cloud Console?
MapsFun.com is built specifically for this purpose. It’s a user-friendly platform that handles all the technical complexity in the background.
- 1. Visual Editor: Simply search for locations and click to add points. No latitude/longitude needed.
- 2. No API Keys: We manage all the backend infrastructure. Just sign up and start building.
- 3. Rich Customization: Easily change map styles, marker icons, and info window content with a click.
- 4. Instant Embedding: Get a simple, secure embed code to paste into any website.
Stop dealing with code and configuration. **Create a beautiful, professional multi-point map effortlessly at MapsFun.com.