How to Mark Several Locations on Google Maps (2025 Step-by-Step Guide)
How to Mark Several Locations on Google Maps: A Practical Guide
Need to pin multiple points on a Google Map for your business, event, or personal project? While the process seems straightforward, creating a polished, shareable map involves navigating several technical challenges. This guide covers the actual working methods and their very real limitations.
Method 1: The Manual Pinning Approach with Google My Maps
Google’s “My Maps” tool is the most common starting point for non-developers. It’s functional but comes with significant constraints.
Step 1: Access and Create Your Map
- 1. Navigate to [https://www.google.com/mymaps](https://www.google.com/mymaps).
- 2. Ensure you’re signed into your Google account.
- 3. Click the prominent “Create a New Map” button.
Step 2: Pin Your Locations
- 1. Click “Untitled map” to give your project a descriptive name.
- 2. To mark locations:
- – Search & Add: Use the search bar at the top. When you find a place, click “Add to map.”
- – Manual Pin: Click the marker icon (🔘) under the search bar, then click precisely on the map to drop a pin.
- 3. For each pin, you can add a custom name, description, and change the marker’s color or shape in the pop-up window.
Step 3: Share and Embed Your Map
- 1. Click the “Share” button. For public embedding, you must set the permission to “Public on the web.”
- 2. To get the embed code, click the three-dot menu (⋮) next to the map title and select “Embed on my site.”
- 3. Copy the provided `<iframe>` code snippet.
Example Embed Code You’ll Receive:
html
<iframe src="https://www.google.com/maps/d/embed?mid=1AbC2dEf3GhIjK4lM5nOpQ&hl=en" width="640" height="480"></iframe>
Code language: HTML, XML (xml)
The Key Limitations:
- – The visual output is generic and often looks unprofessional on a business website.
- – Advanced features are absent: no custom marker images, no branded map styles, and limited info window formatting.
- – The interface becomes sluggish and difficult to manage once you have more than 20-30 locations.
Method 2: The Programmatic Method Using JavaScript API
For a fully customized and integrated map, the Google Maps JavaScript API is the answer. This method offers total control but requires developer expertise.
Step 1: Secure an API Key from Google Cloud
- 1. Create a project in the [Google Cloud Console](https://console.cloud.google.com/).
- 2. Enable billing and activate the “Maps JavaScript API”.
- 3. Generate an API Key under “Credentials” and restrict it to your domain to prevent misuse.
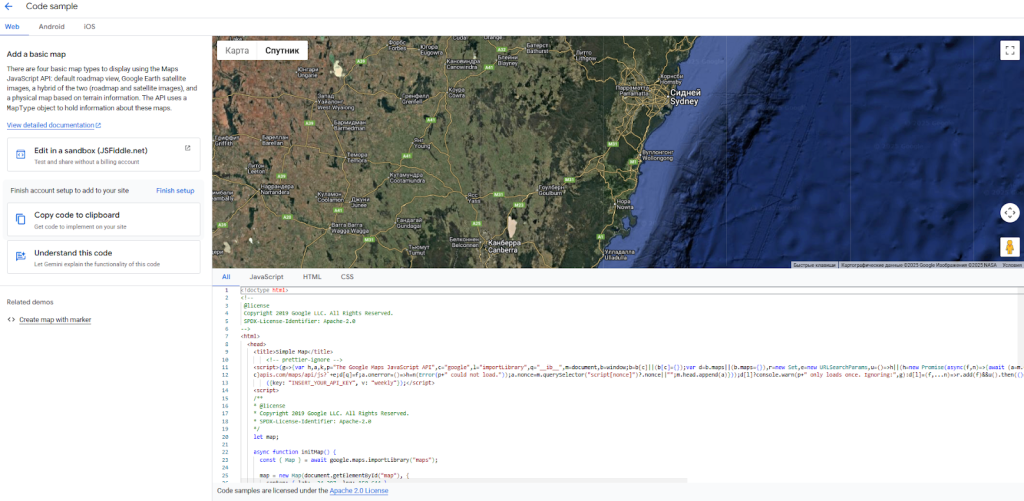
Step 2: Build the Map with Code
Create an HTML file and use this template. The code below initializes a map, adds several markers, and makes each marker display its name when clicked.
You must replace `YOUR_API_KEY` with your valid Google API key.
html
<!DOCTYPE html>
<html lang="en">
<head>
    <meta charset="UTF-8">
    <meta name="viewport" content="width=device-width, initial-scale=1.0">
    <title>Our Service Locations</title>
    <style>
        #map-container {
            width: 90%;
            margin: 20px auto;
            font-family: Arial, sans-serif;
        }
        #map {
            height: 60vh;
            min-height: 500px;
            border: 1px solid #ddd;
            border-radius: 8px;
        }
    </style>
</head>
<body>
    <div id="map-container">
        <h1>Find Our Services Near You</h1>
        <div id="map"></div>
    </div>

    <script>
        function initMap() {
            // Center the map on a specific area
            const centerPoint = { lat: 34.0522, lng: -118.2437 }; // Los Angeles

            // Create the map object
            const map = new google.maps.Map(document.getElementById("map"), {
                zoom: 10,
                center: centerPoint,
                mapTypeControl: true,
                streetViewControl: false
            });

            // Array of locations: [Name, Lat, Lng]
            const locations = [
                ['Westside Branch', 34.0430, -118.2673],
                ['Downtown HQ', 34.0522, -118.2437],
                ['Valley Office', 34.1839, -118.4410],
                ['Harbor Facility', 33.7422, -118.2771]
            ];

            const infowindow = new google.maps.InfoWindow();

            // Create markers by iterating through the array
            locations.forEach(([name, lat, lng]) => {
                const marker = new google.maps.Marker({
                    position: { lat: lat, lng: lng },
                    map: map,
                    title: name, // This creates a tooltip on hover
                    // To add a custom icon, uncomment and modify the line below:
                    // icon: 'https://mapsfun.com/icons/custom_pin_blue.png'
                });

                // Add a click listener to each marker to show its name
                marker.addListener('click', () => {
                    infowindow.setContent(`<div style="padding: 8px; font-weight: bold;">${name}</div>`);
                    infowindow.open({
                        anchor: marker,
                        map,
                        shouldFocus: false,
                    });
                });
            });
        }
    </script>
    <!-- Load the Google Maps API with your key -->
    <script async defer src="https://maps.googleapis.com/maps/api/js?key=YOUR_API_KEY&callback=initMap&v=weekly"></script>
</body>
</html>
Code language: HTML, XML (xml)
The Significant Hurdles:
- – Technical Expertise Required: You need a working knowledge of HTML, CSS, and JavaScript to implement and modify this code.
- – API Key Management: You are responsible for securing your API key and managing the associated Google Cloud billing account, which can be a source of anxiety for many.
- – Rapidly Increasing Complexity: Simple customizations, like the commented-out custom icon, are just the beginning. Implementing more advanced features such as marker clustering for dozens of pins or dynamic data loading requires extensive additional code and debugging time.
The Efficient Alternative: Professional Results Without the Technical Overhead
As this guide demonstrates, marking several locations on a Google Map forces you to choose between a simple but unprofessional tool (“My Maps”) and a powerful but complex developer’s API.
This is the exact problem that MapsFun.com was created to solve. Our platform is designed to bridge this gap, offering the best of both worlds.
- – True No-Code Visual Editor: Add, edit, and manage your locations through an intuitive point-and-click interface—no programming knowledge required.
- – Instant, Deep Customization: Apply beautiful, pre-designed map themes or create your own. Upload custom marker icons and design rich info windows with images and formatted text in minutes, not hours.
- – Zero API Hassle: We manage all the complex backend infrastructure. There are no Google Cloud accounts to set up, no billing details to worry about, and no API keys to secure.
- – Optimized for Performance and SEO: The maps you create are automatically optimized for fast loading and are mobile-friendly, ensuring a great experience for all your visitors
Why spend hours wrestling with clunky interfaces or complex code? You can create a stunning, professional map that marks all your key locations in just a few minutes. Discover the effortless way at MapsFun.com.